Beginner’s guide to Madeira walks and levadas
For a first Madeira walk, we recommend choosing the distance, exposure and walking time before choosing the famous name. A short forest walk, a mountain viewpoint and a longer levada route are different outings. Here is how we would narrow the choice.
On this page (10 sections)
Our recommendation for a first walk
| Your starting point | We would suggest | We would not assume |
|---|---|---|
| You want a shorter forest outing | Consider PR11 and allow for the full return, stopping and viewpoint time | That 1.5 km is the whole outing |
| You want 25 Fontes because the photos look appealing | Compare the full PR6 route with your walking experience and agree the actual start and return points | That it is the same commitment as Balcões; the official return distance is longer |
| You want open coastal scenery | Consider PR8 only after checking its distance, moderate classification, wind and conditions | That low elevation makes it an easy shaded walk; the official description notes wind exposure and no trees |
| Someone prefers very little walking | Discuss a sightseeing route with the exact vehicle-to-viewpoint access checked | That a full trail needs to be included to enjoy the island |
| Your available time is fixed | Choose the walk and entry time before agreeing the transport plan | That an indicative walking duration guarantees a collection time |
If you want a shorter first walk, we would start by considering PR11 Vereda dos Balcões, subject to the official status and your own walking needs. Its listed 1.5 km each way means 3 km in total, with an indicative 1½ hours. Easy is a route classification, not a guarantee of step-free access or suitability for every person.
- Book in this order: check the exact route and current official status, arrange any required entry reservation, then agree the transport and collection details. Recheck conditions before setting out.
- Tell us the longest walk you are comfortable doing, whether steps or exposed paths are a concern, and whether you want a viewpoint visit instead. Those answers matter more than choosing the most photographed trail.
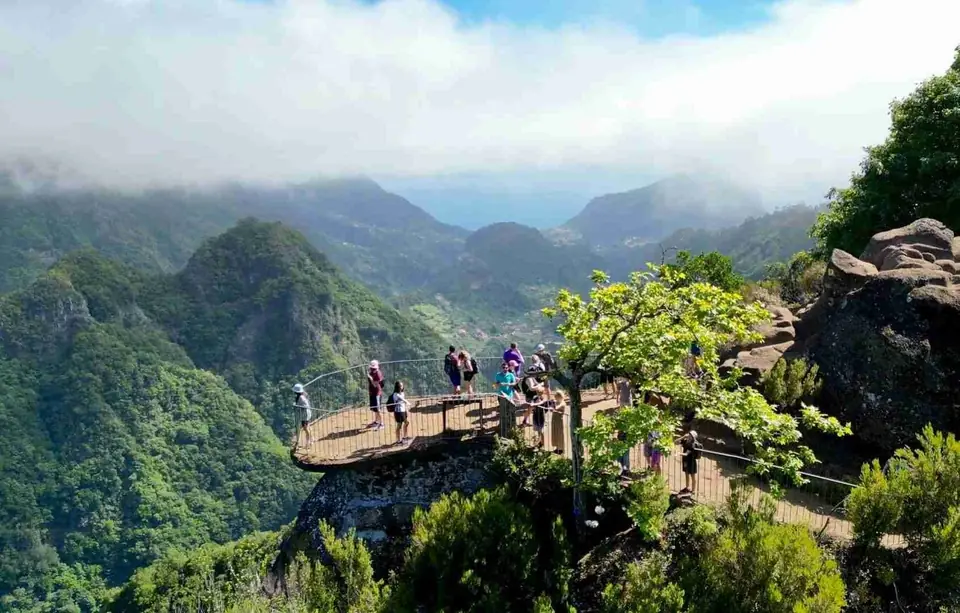
Balcões viewpoint: plan the walk to the viewpoint and the return to Ribeiro Frio, not just the time spent at the railing.
What is a levada walk?
A levada is a water channel, and many walking paths follow these channels through Madeira’s landscape. The word describes the route’s setting, not a guarantee that the path is flat, wide or suitable for every visitor. A short walk can still have uneven ground or exposed sections.
Questions to answer before choosing a walk
| Check | Why it matters |
|---|---|
| Distance and return route | A one-way figure may not include the walk back to your pickup point |
| Steps, climbs and surface | These can matter more than distance for tired knees or younger children |
| Exposure and path width | Choose a route you will feel comfortable walking in both directions |
| Tunnels and equipment | Check whether a torch or other preparation is needed |
| Current conditions | Rain, wind or maintenance can change access |
| Pickup and finish point | Agree exactly where and when you will meet your driver |
PR11 Vereda dos Balcões: the full visit, not just the one-way distance
| Official route detail | Planning implication |
|---|---|
| Ribeiro Frio start and return | Agree collection at the same trailhead unless another arrangement is explicitly confirmed |
| 1.5 km outward + 1.5 km back | Count 3 km, not just the distance to the viewpoint |
| Estimated duration: 1½ hours | Use a walking visit in your day plan, not a brief photo-stop allowance |
| Easy difficulty rating | Still assess your group’s footing, exposure tolerance and conditions |
Visit Madeira lists PR11 at 1.5 km outward plus 1.5 km back, with an indicative duration of 1½ hours and an easy rating. It starts at Ribeiro Frio and follows Levada da Serra do Faial. Count the whole return visit when arranging transport.
Choose by the person with the tightest limit
| Your group’s constraint | Better planning response |
|---|---|
| A shorter walking window | Research a short return outing and allow time to turn back; do not commit to a long point-to-point route |
| Uncomfortable with heights | Check exposure and path width explicitly; a levada name alone tells you neither |
| Knee or balance concerns | Check steps, gradients, surface and the return journey before accepting a difficulty label |
| Children with different stamina | Set the plan around the youngest or least confident walker and keep a realistic turnaround |
| Someone needs step-free access | Ask for access-specific information; consider a vehicle-based viewpoint day if the trail is unsuitable |
No route in this guide is a blanket recommendation for every beginner. Tell a walking guide or transport provider the actual limitation rather than simply asking for an “easy walk”.
Three official route listings that should not be treated as equivalent
Official information checked 16 November 2026. Recheck opening, charges and access close to your visit.
| Route | Official published distance and rating | Planning implication |
|---|---|---|
| PR11 · Vereda dos Balcões | 3 km return; easy; indicative duration 1½ hours | A shorter return outing, still requiring a suitability and access check |
| PR6 · Levada das 25 Fontes | 8.6 km return in the Visit Madeira listing; moderate; indicative duration 3 hours | A longer walking plan; agree the actual starting point and any extra approach or branch |
| PR8 · Ponta de São Lourenço | 4 km outward plus 4 km return; moderate; indicative duration 2½ hours | An exposed peninsula setting rather than a sheltered forest walk; reserve sufficient time for your group |
The published durations are route-reference estimates, not pickup promises. A different trailhead, extra branch, queue, rest or slower group changes the collection plan. When two route descriptions give different totals, check the exact start, end and turnaround before comparing them.
Treat longer walks as their own plan
Well-known routes such as 25 Fontes, Caldeirão Verde and the high mountain trails need a separate assessment of the full route, ability and conditions. Choose a walk because it suits you, rather than because it appears on a list of famous places.
A sunrise sightseeing visit at Pico do Arieiro is different from a PR1 hike. Tell the transport provider the exact walking route, start and finish, not just the name of a viewpoint.
Check access and reservations before travelling
Use the official Madeira hiking page for the current route status and reservation instructions. Official guidance currently requires advance time reservations for classified PR routes through SIMplifica. Check the route-specific requirements, charges and rules there before travelling.
This guide is planning advice, not a live open-or-closed notice. Recheck official information close to your walk.
Road access and walking-route access are separate checks. Rockfalls or landslides may affect the journey to a trailhead as well as the path itself. Confirm the actual route and transport arrangements against the current official notices.
Book the walk and transport in the right order
Official information checked 16 November 2026. Recheck opening, charges and access close to your visit.
A sightseeing visit to the mountain does not create a hiking reservation. A transport booking does not automatically include trail admission or a walking guide unless your confirmation explicitly says so.
- Identify the official PR code and the full route you intend to walk.
- Check the live official status and any restrictions for that route.
- Choose and reserve the entry time through the official portal as required.
- Agree transport around that confirmed entry time, accommodation and exact trailhead.
- Save the reservation confirmation and agree the collection point and procedure if the walk changes.
Plan transport and what to carry
A same-trailhead walk and a point-to-point hike create different driving jobs. Do not use the drive between two trailheads as a measure of how long your provider needs to collect you from your accommodation, reposition and return you afterwards.
Before confirming transport, share the PR code, entry reservation time, accommodation address, group size, walking plan and exact finish. Ask what to do if you turn back or finish early; do not assume the driver is waiting at the end throughout the hike.
- Agree the exact trailhead, finish point and return collection before the day.
- Tell your provider the group size and accommodation location.
- Carry suitable footwear, a warm layer, weather protection, water and food for your chosen walk.
- Check route-specific equipment and prepare for limited phone reception.
- A hiking transfer provides transport; book a walking guide separately if you need one.
Common planning questions
Does an easy rating mean step-free?
No. Read the route description and check surface, steps and exposure against your group’s needs.
Can we decide the finish point after being dropped off?
Plan the route and collection point in advance. Different ends of a walk can require very different driving arrangements.
Is a trail reservation included with transport?
Do not assume so. Agree explicitly who makes the reservation and which entry time is booked before confirming pickup.
Can Balcões be added to an East sightseeing tour?
It can be considered when the route, access and available time allow it. Reserve the walking time by replacing other stops; it is not an extra five-minute viewpoint visit.
Is the published walking duration my return pickup time?
No. Agree collection using the full route, starting point, your group’s pace and any planned breaks. Official durations are indicative route figures.
Does the photograph prove a trail is open today?
No. The photograph illustrates the location; check the official live route status before travel.